


How Setting Style Interacts with Diamond Ratio
Many people focus on selecting a diamond and may overlook the influence of the setting. The setting affects more than simply securing the stone.
The setting plays a role in how the diamond’s proportions appear, in its perceived size, and in how its outline fits the finger. Identical diamonds can appear different depending on the mounting, with fancy shapes being particularly responsive to these changes.
Comparing oval ratios or evaluating emerald-cut proportions can be more effective when considering how the setting affects overall appearance.

Most diamond shoppers spend their energy on the stone and treat the setting as an afterthought, but the mounting has a real effect on how a diamond's proportions read on the finger.
A Quick Word on Diamond Ratios
Every fancy shape tends to fall within a range of ratios where its proportions appear balanced.
A fancy-shaped diamond’s ratio is determined by dividing its length by its width in millimeters. This figure signals how elongated or compact the stone looks from above. Each fancy shape has a range where the proportions tend to appear balanced.
|
Diamond Shape |
Typical Ratio Range |
Visual Character |
|
Oval |
1.30-1.50 |
Balanced elongated oval |
|
Emerald Cut |
~1.40 sweet spot |
Clean rectangular outline |
|
Marquise |
1.60-2.20 |
Long, narrow shape with pointed ends |
|
Pear |
1.40-1.60 |
Balanced teardrop appearance |
|
Cushion (Square) |
1.00-1.05 |
Nearly square cushion |
|
Cushion (Elongated) |
1.15-1.40 |
Soft rectangular cushion |
These numbers give you a starting point, but they do not tell the full story because the setting adds its own layer of visual influence once the diamond is on your hand.
Solitaire Prong Settings and Perceived Geometry
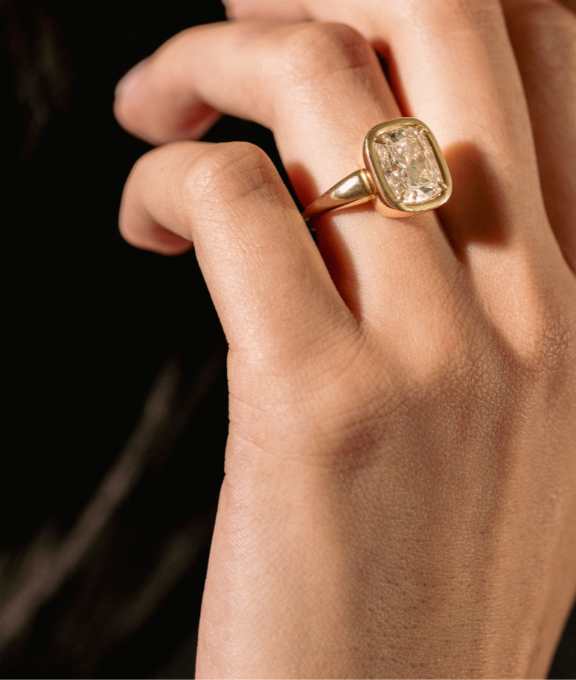
A solitaire prong setting is about as neutral as it gets. The prongs touch only small points along the girdle, so the diamond’s full outline stays visible the way the cutter intended. That said, the number and placement of prongs matter more than most people realize.
A ring with 4 prongs spaced evenly tends to create a slightly boxy appearance because the metal points read like corners. A round stone with 6 prongs makes it look rounder. On an oval, placing prongs at the north and south poles can push the visual impression toward a marquise by giving the stone the appearance of elongated points.
These are small details, but they act as secondary ratio modifiers for your eye. If you want your oval to read as a clean, balanced oval, the prong placement has to support that.

A solitaire prong setting is the most neutral option, it exposes the diamond's full outline with minimal interference.
How Bezels Reshape the Outline
A bezel setting encloses part or all of the diamond’s girdle with a metal rim. According to GIA, this band of metal can make the diamond’s circumference seem larger. The metal outlines the stone, creating a defined frame.
On extended shapes, a thin bezel follows the contour and accentuates the direction of the stone’s length. An emerald cut in a full bezel, for example, has its clean rectangular lines reinforced by the metal border running alongside them. A half-bezel leaves portions of the girdle open, letting more light in while still defining the shape’s key lines.
The trade-off with a full bezel is that it covers more of the diamond’s surface, so a stone with a deep pavilion or less-than-ideal cut can end up looking smaller and less brilliant than it should.

A bezel setting frames the diamond with a metal rim that defines and reinforces its outline, with a thin bezel on an elongated shape accentuating the direction of the stone's length.
Halos and Their Effect on the Ratio
Halos can significantly affect perceived size and proportion. A ring of smaller diamonds set around the center stone increases the overall diameter. Reports from the jewelry industry indicate that a 1-carat diamond with a halo may appear close in size to a 1.5-carat diamond without one.
For fancy shapes, a halo adds more than size by outlining the stone and affecting its perceived ratio. A halo around a marquise can increase the apparent size by approximately 20% to 30%, and can help the proportions of shapes such as pears and marquises appear more balanced on the finger.
If you have a stone with a ratio you love, a halo will further develop that visual character.

A halo of smaller diamonds set around the center stone can make a 1-carat diamond appear close in size to a 1.5-carat stone without one.
East-West Orientation
Rotating an elongated diamond sideways changes its visual ratio. Setting an oval, emerald, marquise, or radiant cut horizontally across the finger shifts the length to lateral coverage. The carat weight remains the same, but the stone appears broader on the hand.
Shapes with higher length-to-width ratios work best here. A square princess or Asscher would not benefit from this approach, but an emerald cut at 1.40 or an oval at 1.50 can look noticeably different when rotated. This orientation tends to be especially flattering on shorter or wider fingers, though it suits many hand types depending on the overall design.

Rotating an elongated diamond sideways shifts its length to lateral coverage across the finger, changing the entire visual impression without adding a single point of carat weight.
Three-Stone Settings and Side Stone Balance
Flanking your center diamond with side stones adds visual weight on either side of the composition. For a shape like a marquise, which can read as narrow because of its elongated points, well-chosen side stones fill that space and create a more proportional look on the finger.
Tapered baguettes beside an emerald cut or pear-shaped side stones beside a marquise are common combinations that highlight rather than compete with the center stone’s ratio.

Well-chosen side stones highlight the center stone's ratio rather than competing with it.
How Settings Affect Perceived Size and Shape
|
Setting Style |
Visual Effect on Diamond Ratio |
Additional Notes |
|
Solitaire Prong |
Shows the diamond’s natural outline with minimal interference. |
Prong placement can subtly change perceived geometry. |
|
Bezel |
Frames the diamond and reinforces its outline. |
Thin bezels emphasize elongated shapes. |
|
Halo |
Expands overall diameter and amplifies perceived ratio. |
It can make a 1-carat stone appear closer to 1.5 carats. |
|
East-West Orientation |
Rotates the diamond horizontally across the finger. |
Works best with elongated shapes. |
|
Three-Stone |
Adds side weight that balances narrow shapes. |
Common with marquise and emerald cuts. |
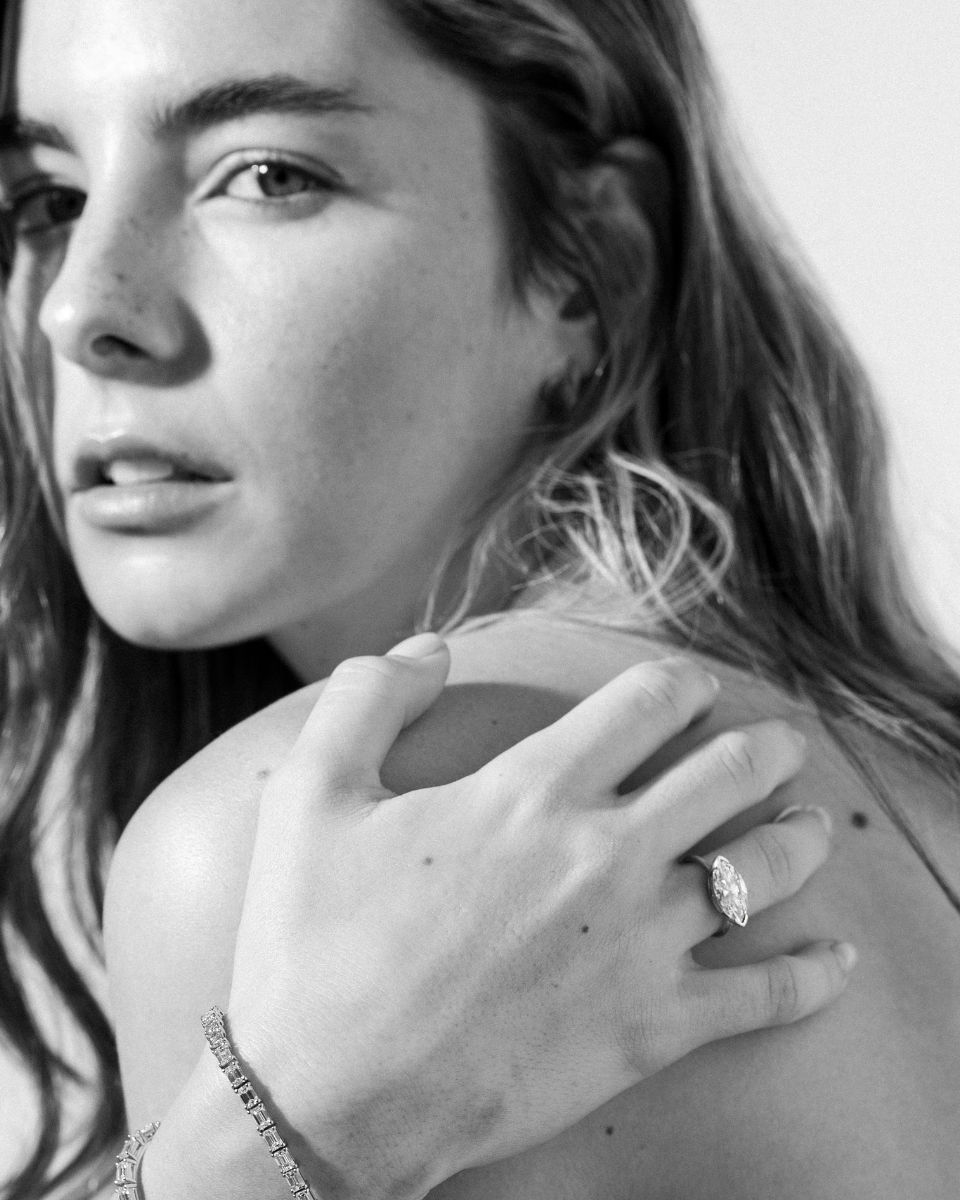
Ratio, Bow-Ties, and How Settings Help
Fancy shapes with lengths exceeding their widths often exhibit a bow-tie effect, a shadow that runs across the diamond’s midsection where light cannot escape efficiently.
The strength of this effect often depends on the diamond’s proportions. Ovals with a ratio between 1.3 and 1.5 typically show less of a bow-tie, while slimmer stones above 1.5 may display a more noticeable one.
Certain settings can help soften the effect. Halo and pavé designs surround the center stone, adding sparkle and drawing the eye outward, reducing the visual impact of a moderate bow-tie.
Orientation can also change how the bow-tie reads. In an east-west setting, the bow-tie rotates so that it runs vertically along the finger, altering its apparent visibility depending on the viewing angle.

Elongated fancy shapes with ratios above 1.50 are more likely to show a visible bow-tie effect, but the right setting can soften its impact.
Protecting Vulnerable Shapes at Extreme Ratios
Diamonds rank 10 on the Mohs hardness scale. However, pointed shapes require additional protection.
-
Marquise and pear diamonds have delicate tips that can chip if left exposed.
-
Very narrow stones at the high end of the ratio range carry greater structural risk.
-
V-prongs cradle the stone’s points and shield those edges from impact.
Mounting Compatibility
Unusual ratios may complicate the mounting process.
-
Standard mountings are designed for calibrated diamond sizes.
-
Atypical ratios may not seat correctly in pre-made settings.
-
Custom or semi-custom mountings are often required for uncommon proportions.
-
Buyers should factor additional time and cost into the process.
How Diamond Ratio and Setting Work Together
The ratio you choose for your diamond sets a direction, and the setting either follows that direction or quietly redirects it. Prong count and placement nudge how the outline reads. Bezels define and reinforce the silhouette. Halos amplify size and proportion. East-west orientation reframes the entire presentation.
At extreme ratios, the setting is responsible for keeping the stone secure and properly mounted. Both elements contribute to a cohesive design.


Leave a comment (all fields required)